Radon progeny and thoron progeny, the ugly daughters of the radioactive noble gases Rn-222 and Rn-220, measure them yourself – a construction guide with Arduino.
Today, most people are informed and aware of the health risks associated with radioactive radiation. However, this awareness is usually tied to radiation exposure from medical examinations, emissions from nuclear power plants, or contamination resulting from nuclear accidents such as Chernobyl and Fukushima. Yet, aside from radiation exposure caused by medical procedures, the majority of radioactive exposure that people in Germany experience comes from inhaling the progeny of the radioactive noble gas radon, which is omnipresent in the air we breathe, particularly in indoor environments.
There have been many discussions on the following key questions related to this issue:
- What is radon?
- Where does it come from?
- Is it dangerous?
- How does it enter my home?
- How can I measure it?
- How can I protect myself from it in my home?
- A great deal has already been written about this. For further information, I would like to refer to various websites, such as those of the BfS, Wikipedia , or radon-info.
- To learn about the radon levels in one’s own home or apartment, one must rely on measurements carried out by a specialized company. These professional companies almost exclusively use measurements of radon gas. However, there are now radon measurement devices available for under €300 that allow you to conduct measurements in your own home.
- In this article, I would like to introduce an alternative to radon measurement — a device for measuring radon progeny (also referred to as radon decay products), which can be built by a hobbyist with average electronic skills at a low financial cost. Depending on the supplier, the material costs start at around €60.
Brief Introduction – What are Radon Progeny, and why should they be measured for radiation protection?
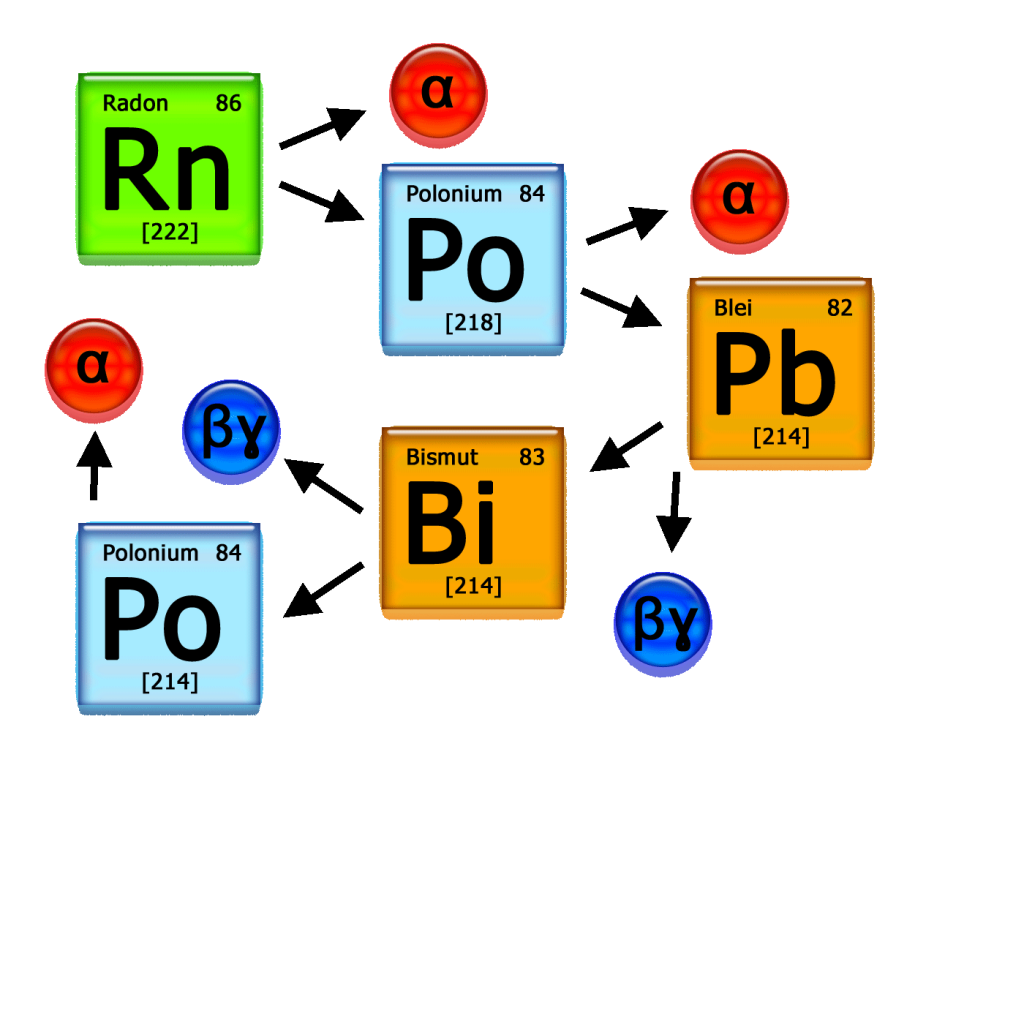
It is mostly the progeny (sometimes humorously referred to as the “ugly daughters”) that, when inhaled through air contaminated with these substances, cause the radiation dose, and thereby the “danger” and ultimately the increased risk of lung cancer in the body. Once the radioactive gas (chemically a noble gas) enters the indoor air, its radioactive decay produces the so-called progeny are build.

These are chemically heavy metals and therefore have very different physical and chemical properties compared to the radioactive noble gas radon. When inhaling the mixture of gas and progeny present in the air, only the progeny remain in the lungs and accumulate there, while the noble gas is exhaled without accumulation. As a result, about 95% of the lung dose is caused by the progeny, and only about 5% by radon itself. The progeny emit alpha, beta, and gamma radiation, though in practical terms, only the alpha radiation is relevant for the dose.
Note: I will focus for now solely on radon, specifically Rn-222, as it is the most relevant. Thoron is currently not as prominent in radiation protection. I will only return to thoron progeny when discussing the construction of the device or the evaluation algorithm.
Currently, however, radiation protection primarily involves measuring the gas radon and not its progeny. One of the reasons for this is likely that radon can be measured with passive systems (i.e., without electronic components) over longer periods of time. However, analyzing such measurements requires a well-equipped laboratory and considerable effort for quality assurance.
In contrast, measuring progeny requires, if done seriously, an electronic measuring device with an air pump. However, this measurement offers what I believe are significant advantages:
- The measurement is much more sensitive than radon measurement, allowing for quicker results at low concentrations, which are common in the vast majority of homes.
- It measures the actual “cause” of the dose directly, rather than indirectly through the gas.
- Systematic errors due to high or fluctuating humidity and temperature dependency are much lower or practically irrelevant compared to radon measurement.
- Even with devices built by amateurs, one can conduct reliable and affordable measurements in their own home — which is my motivation for publishing a construction guide.
I don’t want to hide the fact that you will need to invest some time (and patience) to achieve success. However, the process can be very rewarding, with plenty of enjoyment from the progress made, as well as gaining new insights and perhaps a deeper understanding of the issue of natural radioactivity in your own home.
However:
I must point out at this stage that the measurement values obtained with the self-built measuring device cannot be used for legal purposes. For that, calibration or retesting by an accredited measurement facility would be necessary. Additionally, quality-assured retests should be conducted before deciding to make larger investments to reduce the radon levels in your home as determined by the self-built measuring device. I will provide some guidance on interpreting the measurement results and the expected uncertainties after the publication of the construction guide.
This raises the question:
Why should I even build my own measuring device?
There are three reasons for this:
- The fun of building the measuring device.
- You get free information about the radon levels in your home with the self-built device.
- You can test the effectiveness of simple measures to reduce radon (progeny) exposure yourself.
A brief introduction to the physical processes that occur in the air after radon decay, as well as the fundamentals of measurements, can be found in the menu under Basics – Physical Principles – and Principles of Measuring RnFP.
